How does the yarn look and feel in your selected stitch pattern?
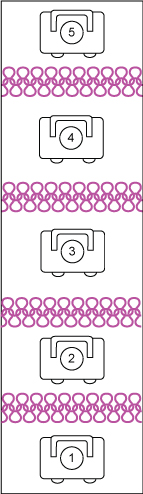
Cast on and knit at various tensions.
Take time to play with your yarn.
Start at a tight tension and knit a few inches changing the tension as you knit. Marking the tension with eyelets as you go.
When you take the knitting from the machine, you'll get a good idea of what tension feels best to you and looks best after blocking.
Armed with that knowledge, you can knit a accurate "real" gauge swatch. No surprises here!
A 5" X 5" (at a minimum) swatch used for establishing gauge.
Machine knitters mark a set number of stitches and rows to make it easier to calculate gauge. No counting needed!
I recently had an epiphany about swatching when I'm trying to MATCH gauge. In the past I've knit my gauge swatches as I learned as a machine knitter. I never use the gauge rulers that came with my machines, but I've always knit my swatches according to the "rules". (DUH)
On my standard machine, I've dutifully cast on 60 stitches and knit 60 rows between marked rows . I marked off 40 stitches and got out my regular ruler, measured and did the math.
Being a total non-math person, I can't tell you how many times I've messed up the calculation of my gauge ... even when using a calculator. (Sound familiar?)
THE EPIPHANY: I was hand knitting a HK pattern. Hand knitting the complicated sections of the pattern was fun, but I decided that knitting a whole lot of stockinette (the boring stuff) by hand was dumb. So I threaded up my machine and started to knit a swatch.
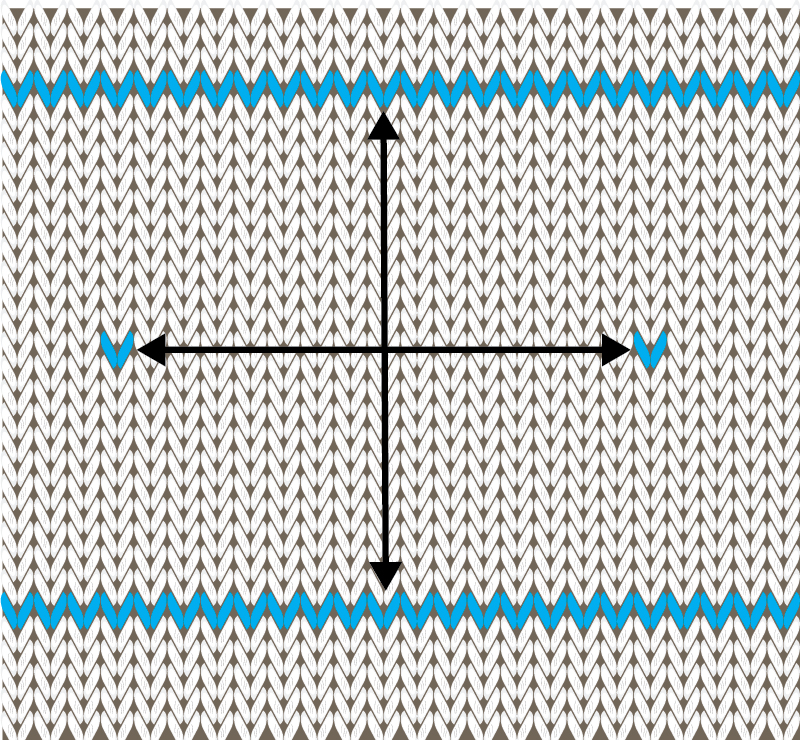
The gauge I needed to match was 24 sts and 30 rows per 4".
I cast 60 stitches (so I could easily measure 24 stitches in the center of the swatch)
I knit a few rows with my main yarn (marking with eyelets the tension gauge)
2 rows of a contrasting color
Knit 30 rows
2 rows of a contrasting color
A few main yarn rows and bound off
AT THE SAME TIME I also marked the stitches that were framing my desired 24 stitches.
In other words, instead of marking the traditional number of stitches and rows, I broke the "rules" and marked my DESIRED GAUGE of 24 stitches and 30 rows as I knit the swatch.
I let the swatch rest, then wet blocked it and let it sit overnight.
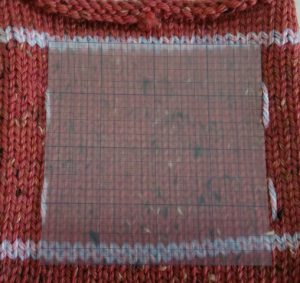
The next day, I put my handy-dandy 4" measuring tool down on my swatch. (see below about my DIY 4" tool)
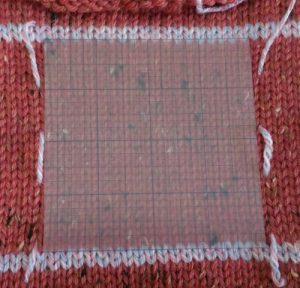
As you can see, by the first photo, my stitch gauge was good, but my row gauge needed to be adjusted. It was easy to see through my tool that I had too many rows to 4". I adjusted my mast tension, knit another swatch and VOILA! I was able to match my gauge EXACTLY --- with NO MATH!
Stitch Gauge is close - but the row gauge is off
24 sts x 30 rows = 4" Success!
For my tool, I cut a 4" x 4" square of quilters template plastic (readily available at craft stores) to create my Handy-dandy tool. Because it's see-through, I can see my marked stitches and rows on my swatch.
You could use a square of any material (cardboard, paper, clear plastic of any kind). You will be amazed at how much easier it is to measure gauge (for both hand and machine knitting).
Before You Go…
Need help with machine knitting? Let us point you in the right direction!