Match Your Target Gauge Without Math: The 4-Inch Square Technique
Tired of counting stitches and doing gauge math? Discover a simpler way to match your target gauge exactly. Instead of counting traditional stitch and row numbers, learn how to create a swatch that measures your desired gauge directly using a 4-inch square tool. Perfect for converting hand knitting patterns to machine knitting or any project where precise gauge matters. This no-math method takes the guesswork out of gauge matching and helps you achieve perfect results every time.
gauge
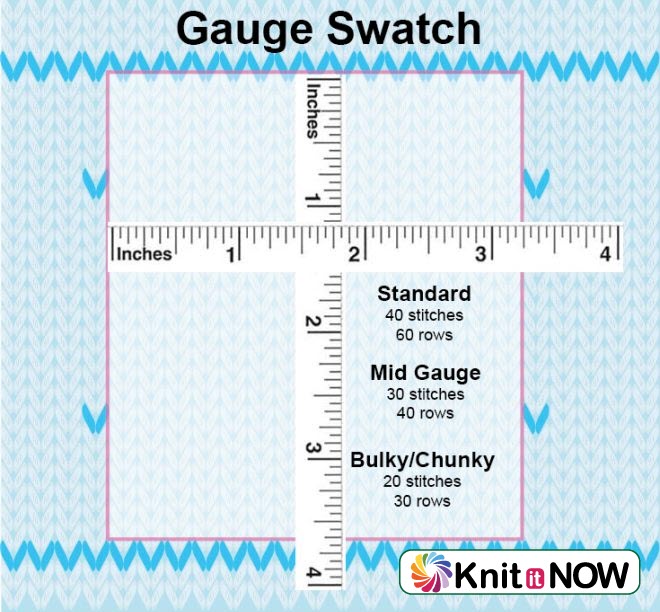
Traditional Method:
Measure a specific number of stitches and rows based on your Needle Pitch
Standard gauge:40 stitches and 60 rows
Mid-Gauge: 30 stitches and 40 rows
Bulky/Chunky: 20 stitches and 30 rows
These "rules" are based on using knitting machine gauge rulers
Visual Method
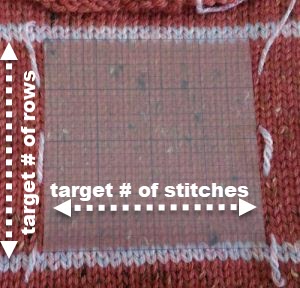
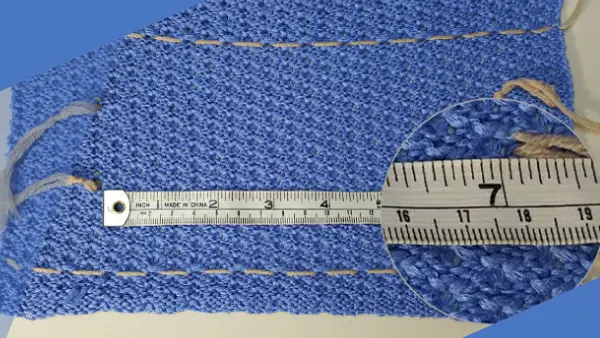
Mark the required stitches and rows as you knit. Place a 4" x 4" template to confirm gauge.
I recently had an epiphany about swatching when I'm trying to MATCH gauge. I've always knit my swatches according to the "rules" which forced me to "do the math".
On my standard machine, I've dutifully cast on 60 stitches and knit 60 rows between marked rows . I marked off 40 stitches and got out my regular ruler, measured and did the math, calculating how many stitches and rows = 4"/10cm
Being a total non-math person, I can't tell you how many times I've messed up the calculation of my gauge ... even when using a calculator. (Sound familiar?)
THE EPIPHANY: I was hand knitting a HK pattern. Hand knitting the complicated sections of the pattern was fun, but I decided that knitting a whole lot of stockinette (the boring stuff) by hand was dumb. So I threaded up my machine and started to knit a swatch.
Matching Gauge
The gauge I needed to match was 24 sts and 30 rows per 4".
I cast 60 stitches (so I could easily measure 24 stitches in the center of the swatch)
I knit a few rows with my main yarn (marking the tension gauge with eyelets)
2 rows of a contrasting color
Knit 30 rows (the desired number of rows in 4"/10cm)
2 rows of a contrasting color
A few main yarn rows and bound off
AT THE SAME TIME I also marked the stitches that were framing my desired 24 stitches.(hang markers on needles left 25 and right 25
In other words, instead of marking the traditional number of stitches and rows, I broke the "rules" and marked my DESIRED GAUGE of 24 stitches and 30 rows as I knit the swatch.
I let the swatch rest, then wet blocked it and let it sit overnight.
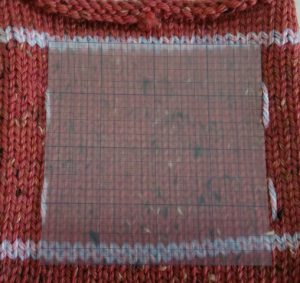
For my tool, I cut a 4" x 4" square of quilters template plastic (readily available at craft stores) to create my Handy-dandy tool. Because it's see-through, I can see my marked stitches and rows on my swatch.
You could use a square of any material (cardboard, paper, clear plastic of any kind). You will be amazed at how much easier it is to measure gauge (for both hand and machine knitting).
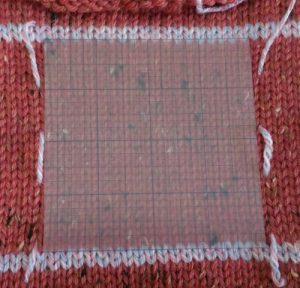
As you can see, by the first photo, my stitch gauge was good, but my row gauge needed to be adjusted. It was easy to see through my tool that I had too many rows to 4". I adjusted my mast tension, knit another swatch and VOILA! I was able to match my gauge EXACTLY --- with NO MATH!