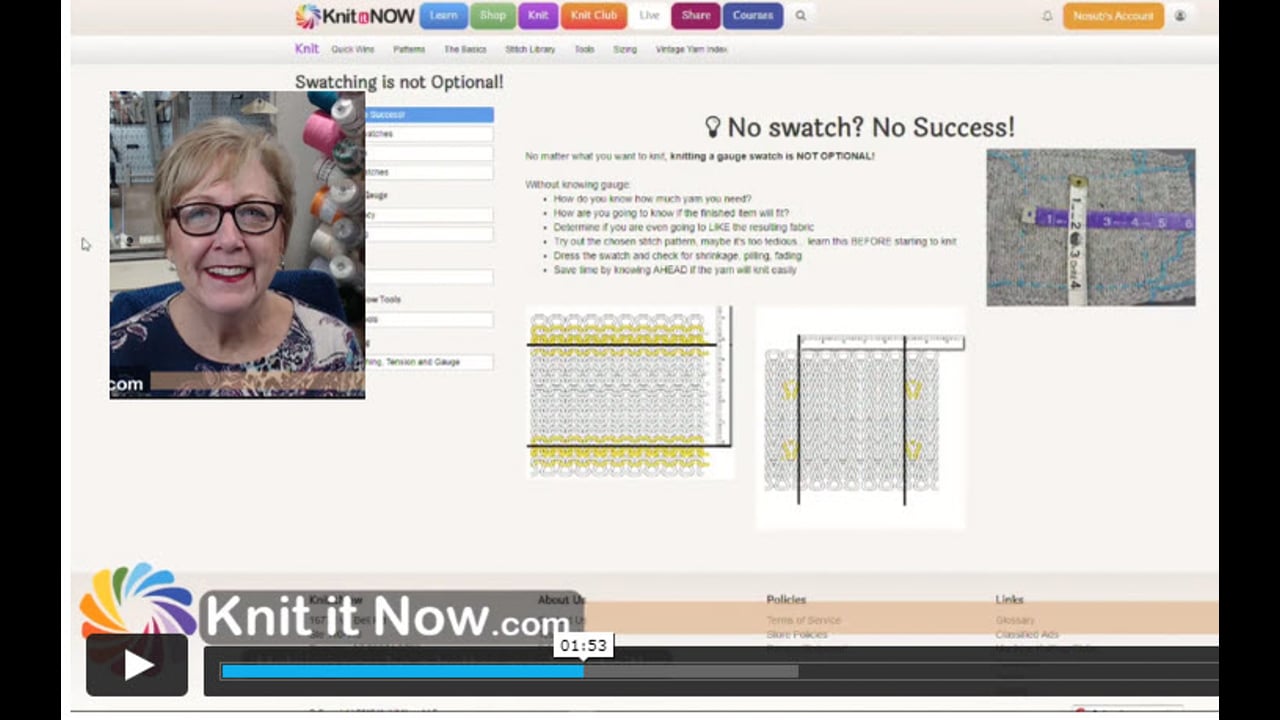
Swatching is not Optional!
Importance of Gauge
Consider This
Handy Knit it Now Tools
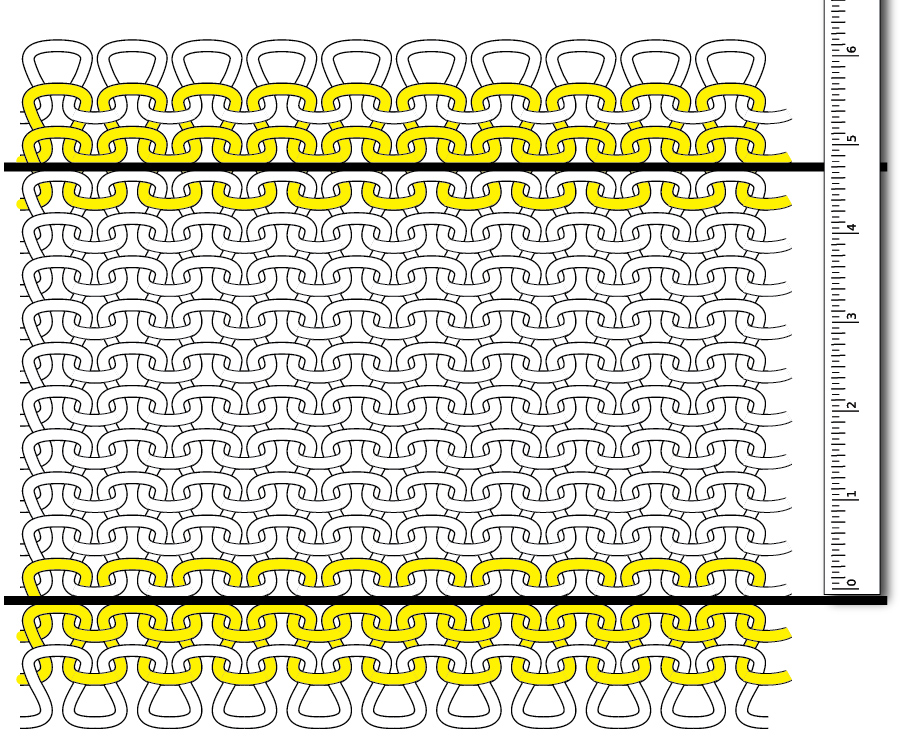
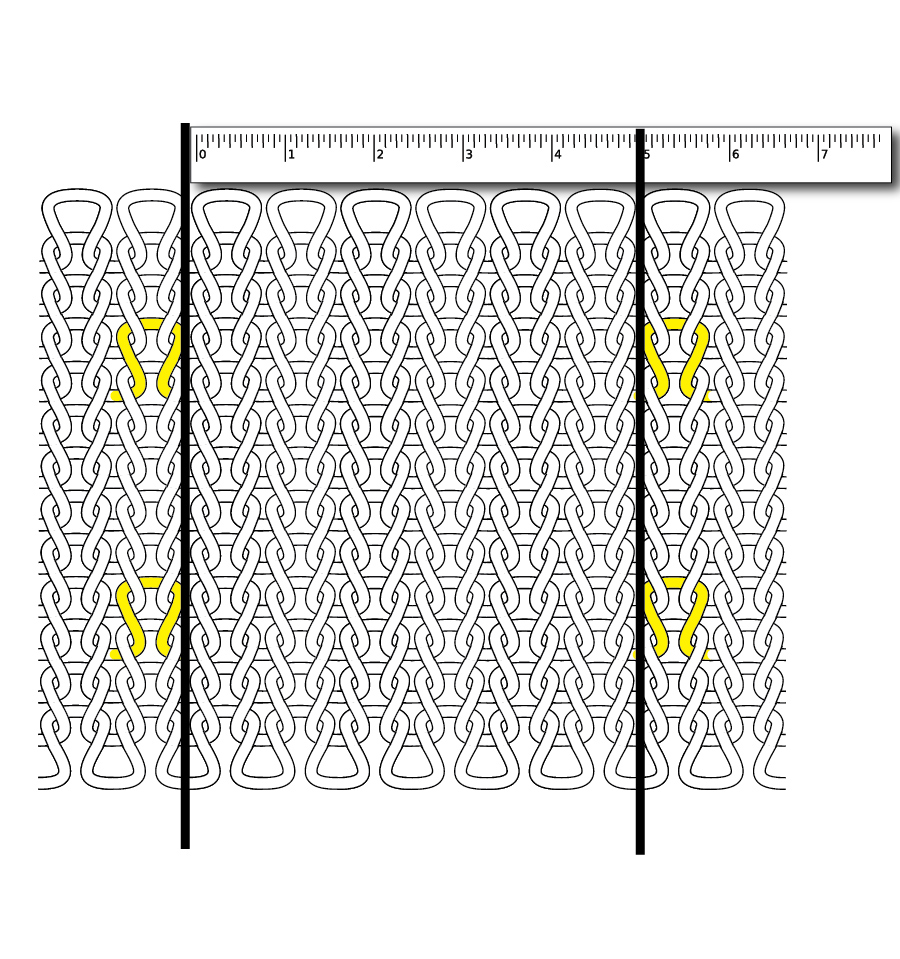
More Swatching
Green, Yellow, Blue Gauge Rulers
No swatch? No Success!
No matter what you want to knit, knitting a gauge swatch is NOT OPTIONAL!
Without knowing gauge:
- How do you know how much yarn you need?
- How are you going to know if the finished item will fit?
- Determine if you are even going to LIKE the resulting fabric
- Try out the chosen stitch pattern, maybe it's too tedious... learn this BEFORE starting to knit
- Dress the swatch and check for shrinkage, pilling, fading
- Save time by knowing AHEAD if the yarn will knit easily


How to Knit Swatches
Swatching Tips
Critical tips for machine knitting accurate gauge swatches.
The whole point of a swatch is to accurately determine how many stitches and rows you are getting with YOUR yarn on YOUR machine. For accuracy, you don't measure a swatch from edge to edge, you measure in the center of the swatch.
- It's important to knit a swatch that is large enough to measure AT LEAST 4" square in the middle.
- To prevent errors, knit the same number of stitches and rows on every swatch you knit on a specific machine.
- Use contrasting color yarn of a similar weight to your garment weight to mark the center area of your swatch
- Permanently record your tension setting on your swatch (eyelets or tag)
- Let your swatch rest before measuring
- Dress your swatch as you will treat your finished knitting.
- Measure accurately - both flat and hanging
- Swatch for every stitch pattern you will be knitting
BOTTOM LINE:
- Unless you are using a gauge ruler, knit a swatch AT LEAST 5" square. (Just guess ... don't get hung up with rules) You want to measure the stitches within the middle of the swatch. Don't try to measure from edge to edge, you WON'T get an accurate measurement.
- Mark a section at least an inch from each edge of your swatch. Use a contrasting color yarn and baste a quick square.
- Measure the square and count the number of stitches and rows within the square.
Divide the number of stitches by the width measurement (24 sts / 4" = 6 stitches per inch)
Divide the number of rows by the length measurement (30 sts / 4" = 7.5 rows per inch)
Armed with this information, match a pattern gauge or use the Knit it Now Dynamic "Basics" patterns to create your sweater.
3 Types of Swatches


Tips for Accuracy
Tension Setting
Hand knitters can change needle sizes to adjust the gauge of their knitting. Another of the many advantages of machine knitting is to quickly make tension changes with both the carriage tension dial and the mast tension setting.
- Quickly match a pattern gauge
- Change gauge while knitting for interesting texture and fabric
- Improve the quality of your knitting with gauge changes
- Troubleshoot knitting problems with gauge changes
What Controls Tension?
Knitting Machine Gauge and Tension
Carriage and Mast Tension Dials
- Maybe you want to keep out the cold with a thick, tight knitted fabric for warm hats and mittens.
- A loose, open, drapey fabric may be just the ticket for a sweater or shawl
Think of the Carriage Tension Dial as the hand knitting needle size.
Think of the Mast Tension Dial as the tension a hand knitter would apply to the yarn with her fingers
The Stitch Dial on your carriage controls how the yarn passes through the carriage and is placed in the hooks of the needles. A smaller number makes a tight stitch, a larger number makes a loose stitch.

Carriage Stitch Dial

Mast Tension Dial
The Mast Tension Dial, along with the yarn guides/tension springs (antennae) control the tension of the yarn as it's fed into the carriage.
More Tips
'I hate math' Tools
These tools are designed for the "math impaired" (like me)


Course: Swatching, Tension and Gauge

Purchase This Home Study Course
Price:
$12.99
This course is FREE with a yearly subscription to Knit It Now
Subscribe Today
Complete Course with Exercises
Guarantee your success with swatches
Tension Settings
Yarn Usage
Helpful Tools from Knit it Now
Accurate Gauge Measurement Methods
This tutorial covers 2 different methods of measuring gauge: working with gauge rulers and using a standard ruler. It includes a discussion about the green ruler, yellow ruler and blue rulers.
The green, yellow, and blue gauge rulers were originally designed to "standardize" measuring gauge. DesignaKnit refers to gauge based on these standards. Charting Devices (Knit Leader, Knit Radar) use these standards as well.
NOTE: you may find gauge rulers in other colors and shapes made by third-party manufacturers. The key is to identify the scale that the ruler is using. It should be printed on the ruler. If you aren't sure, you can't rely on that ruler to give you accurate gauge measurements.
The green, yellow, and blue gauge rulers were originally designed to "standardize" measuring gauge. DesignaKnit refers to gauge based on these standards. Charting Devices (Knit Leader, Knit Radar) use these standards as well.
- You don't NEED these rulers to measure gauge. A regular ruler works fine.
- It's the calibration of the ruler that is important, not the color. In other words, you could use a green ruler and measure 40 stitches and 60 rows knit on any gauge machine (although it might not be practical).
- No matter what method you use, be consistent to prevent mistakes.
Green (Standard Gauge) | 40 stitches / 60 rows |
Yellow (Mid Gauge) | 30 stitches / 40 rows |
Blue (Bulky/Chunky) | 20 stitches / 30 rows |
NOTE: you may find gauge rulers in other colors and shapes made by third-party manufacturers. The key is to identify the scale that the ruler is using. It should be printed on the ruler. If you aren't sure, you can't rely on that ruler to give you accurate gauge measurements.