Julie's Mystery Sweater
Fellow knitter, Julie is test knitting a new Knit it Now pattern. Julie is a VERY experienced knitter (including production knitting) and she offered to share her words of wisdom as she knits the new design.
HINT: It's going to be a mix of plain knitting and lace ... we can't wait to see it!
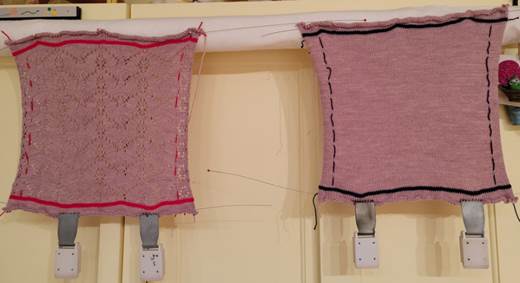
- Yarn: Knit Picks Twill Fingering
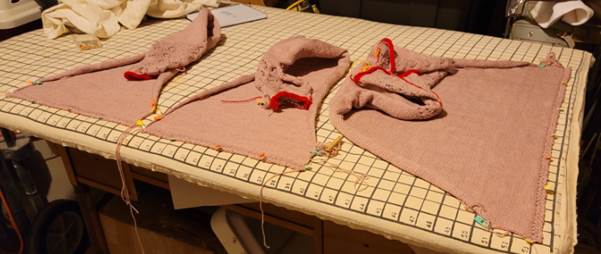
- Measured over 80 stitches and 100 rows (hanging) (the larger the swatch, the more accurate the gauge)
- Stockinette Tension 9.1, lace tension 8.2
- Julie used blocking wires
- Notice that she ran strands of yarn to mark the stitches
- Swatches rested overnight - then blocked, hung, and measured
Tips from Julie:
Blocking tips
Setting in Sleeves on the Machine
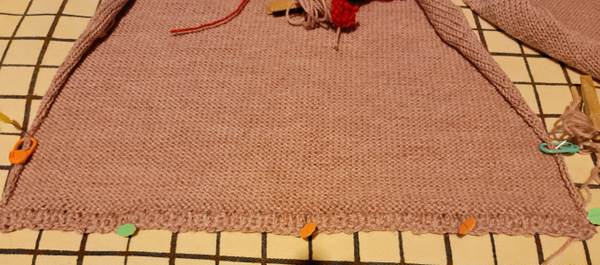
- Knit the sleeves first and confirm gauge
- Let the knitting rest overnight before blocking
- Use a blocking board and pin to size
- Use blocking wires
- Steam
- Note the waste yarn at the cuff. Wonder what she has planned for the cuffs?
- Waste yarn at the sleeve cap. Julie plans to set in the sleeves on the machine. Leaving "live" stitches prevents a tight bind off at the top of the sleeve
Blocking tips
Setting in Sleeves on the Machine
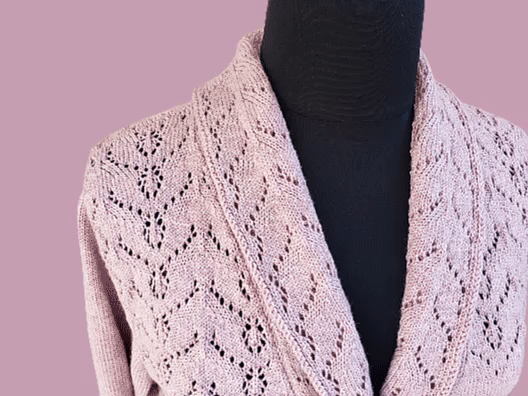
We're starting to get a hint of Julie's design .. lace and stockinette
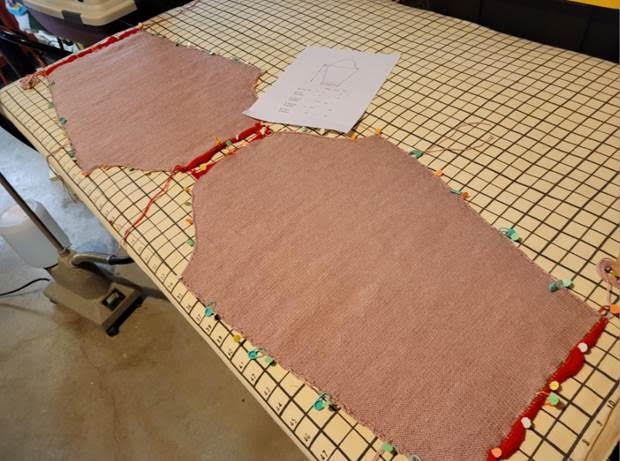
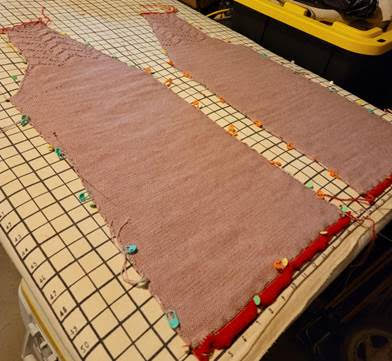
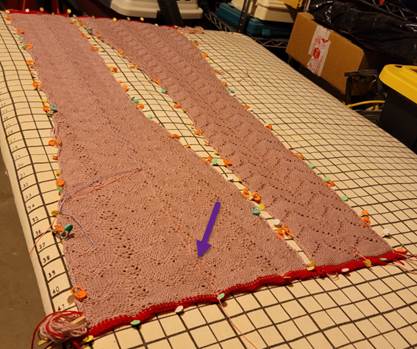
Joining Shoulders on the Machine (AKA 3 needle bind off) Mix 'n Match Stitch Patterns
- Blocking board, blocking wires ... steam ... making progress!
- Notice the waste yarn at the top and bottom
- Remember that Julie knit 2 swatches? She needed to establish the gauge for both stitch patterns. Watch the video for tips about Mixing and Matching Stitch patterns
Joining Shoulders on the Machine (AKA 3 needle bind off) Mix 'n Match Stitch Patterns
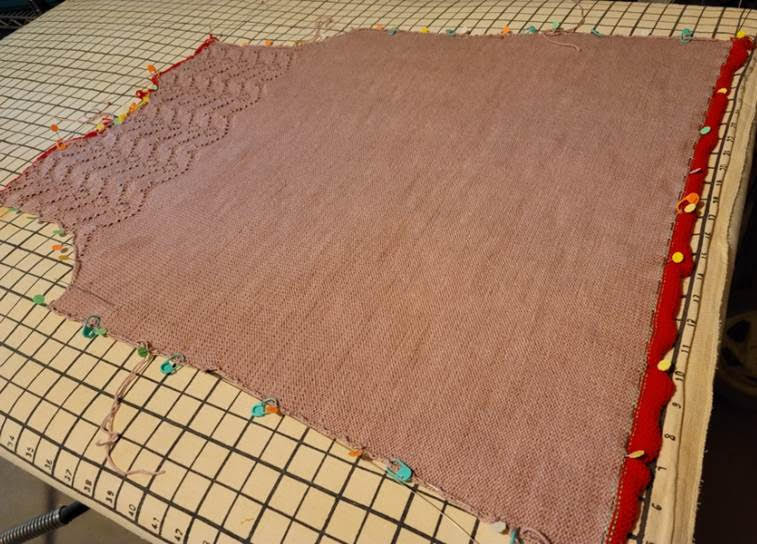
Some insights about the fronts:
- Knit the left front on needles left of L1. Knit the right front on needles right of R1. This will ensure the lace patterning is the same on both sides. Do not center on the needle bed.
- Mark the front edges every 40 rows like the side edges. This will help when attaching the bands.
- When knitting the lace yoke, watch the needles on both sides. You don’t want an eyelet closer than two stitches to the edge. This will make attaching the sleeves and front bands easier.
- If you need to attach a new yarn end, do it on the sides. It’s helpful when attaching the front bands not to have to work in yarn ends.
- Block both fronts side by side if possible and match to back measurements.
- Remember, if you added darts to your fronts, the total length of the front will be longer (depends upon the depth of your dart). The beginning of the underarm shaping to hem should be the same measurement as the back’s. From beginning of underarm shaping to start of shoulder shaping should also match the back’s measurement.
Check out these tutorials:
" I scrapped on because I hadn’t decided what I was going to do for the hems. Turns out, I could have attached the hems to the bottoms before the first blocking…still would have needed to scrap on though because I reduced stitches by ¾ for the tuck hem. Looks similar to double crochet. But… after knitting the hems yesterday, I needed to do a light blocking of just the hems."
You'll see the hems up close with the finished sweater ... stay tuned!
You'll see the hems up close with the finished sweater ... stay tuned!
The Bands/Collar
Julie's Hints- The bands will be folded over. I kept a needle out of work for a Turning Row
- I ran a strand of ravel cord up the ladder created by the center needle out of work. Because my yarn is quite soft, I was afraid I would “lose” this ladder for my next step
- I put blue row markers where the V of the neckline began and ended. The V neckline ends at the shoulder then goes straight to the center back neckline. I used pink markers to mark every 40 rows to aid in attaching to the cardigan.
- I added ½” length from the start of the V to the shoulder and ¼” from the shoulder to the center back neckline so I can ease this in for extra fabric to help make the shawl collar roll nicely.
- I scrapped on and off so I can Kitchener Stitch those two seams.
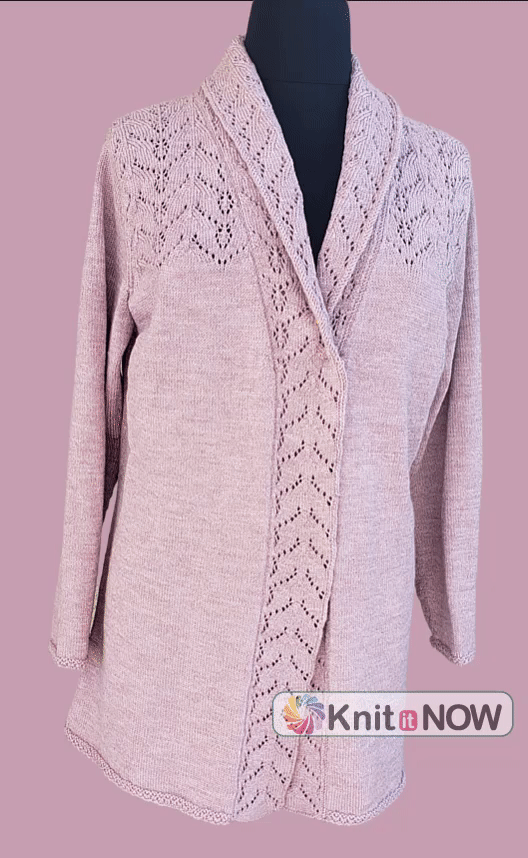
Voila! Julie's "mystery" sweater turned out amazing!
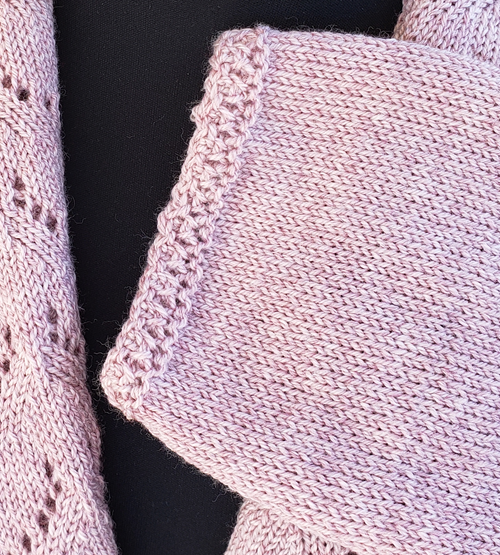
- The Shawl collar is the focal point of this sweater.
- Julie knit the front bands and shaped the shawl collars from hem to neck in lace
- She used a technique from Mary Anne Oger of Knitwords.com to create a decorative, crisp edge along the collar and bands.
- The added Bust Darts provided adding shaping for great fit
- No old-fashioned hung hems or ribbing for this sweater! Check out Julie's Tuck Stitch Hems
- The shaped body reduces bulk for the long length of this sweater